Step 1: Install S-Docs
This quick installation & basic configuration guide will teach you how to install S-Docs and create & email a custom document in Salesforce.
1. Navigate to our Salesforce AppExchange listing and click Try It to install in a Sandbox (recommended) or Get It Now to install into a production/developer org.

2. Confirm your details and click Continue to Installation.

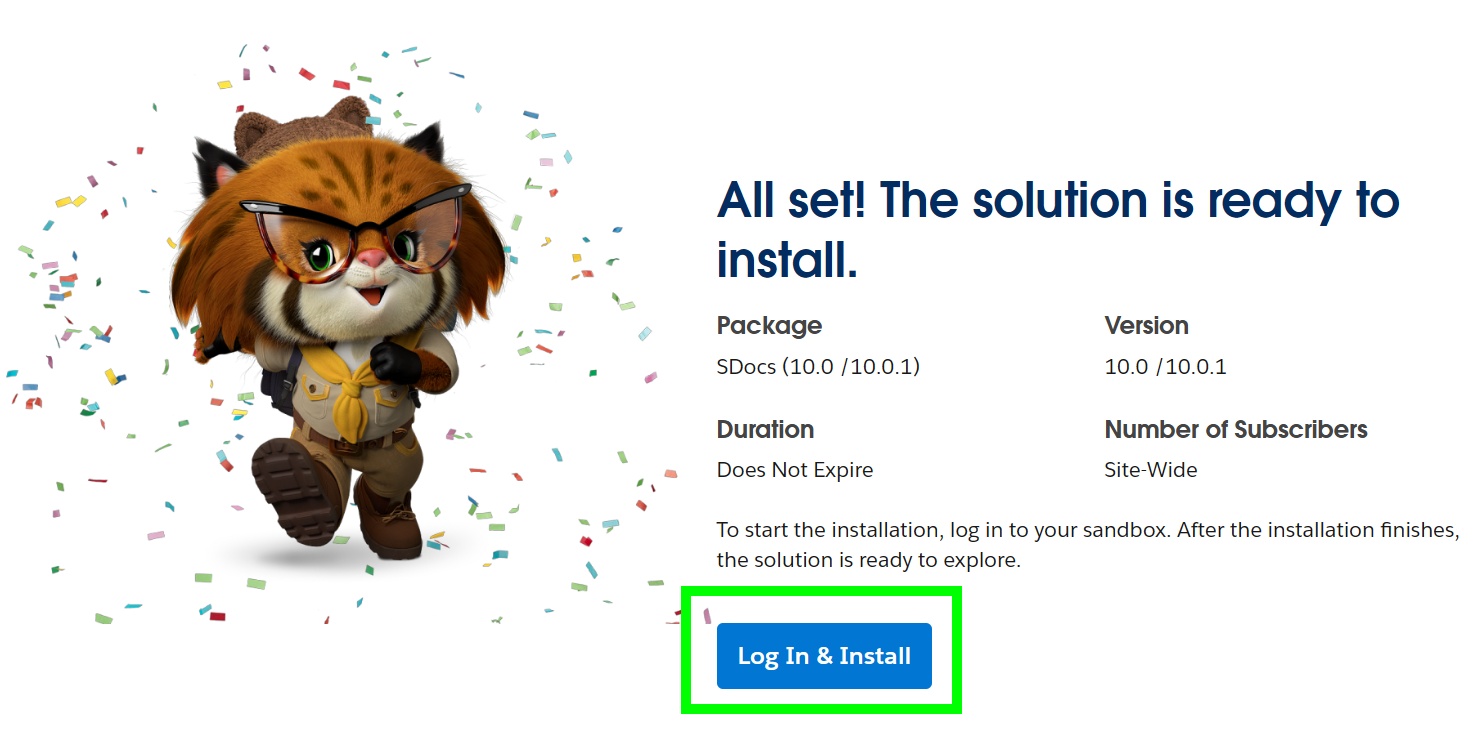
3. Click Log In & Install to log in and choose the Salesforce org you'd like to install S-Docs into.
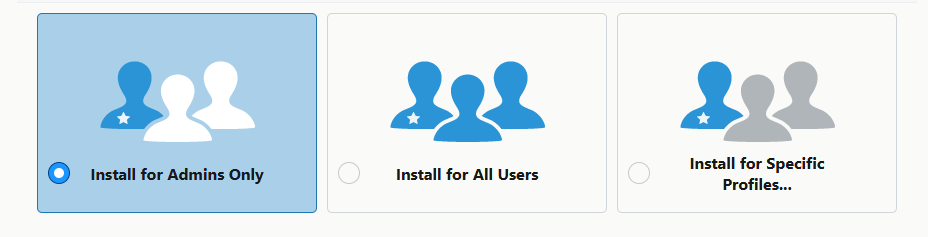
4. You'll then see the following screen. We recommend selecting Install for Admins Only. Click Install.
Congratulations! S-Docs is now installed in your org.
We recommend assigning the S-Docs User or Administrator permission sets to yourself and users who will be interacting with S-Docs. Learn more about S-Docs permission sets here.
Step 2: Add S-Docs to page layout(s)
In step 2, you will add S-Docs to your desired object page layout(s). This will enable end users to access and interact with S-Docs. There are two main ways to enable S-Docs for your object(s).
Option 1 (recommended): Add the S-Docs Lightning Web Components (LWCs) to your page layout
The S-Docs package comes with two Lightning Web Components that you can use to allow users to select and generate templates, as well as interact with the documents that they generate.
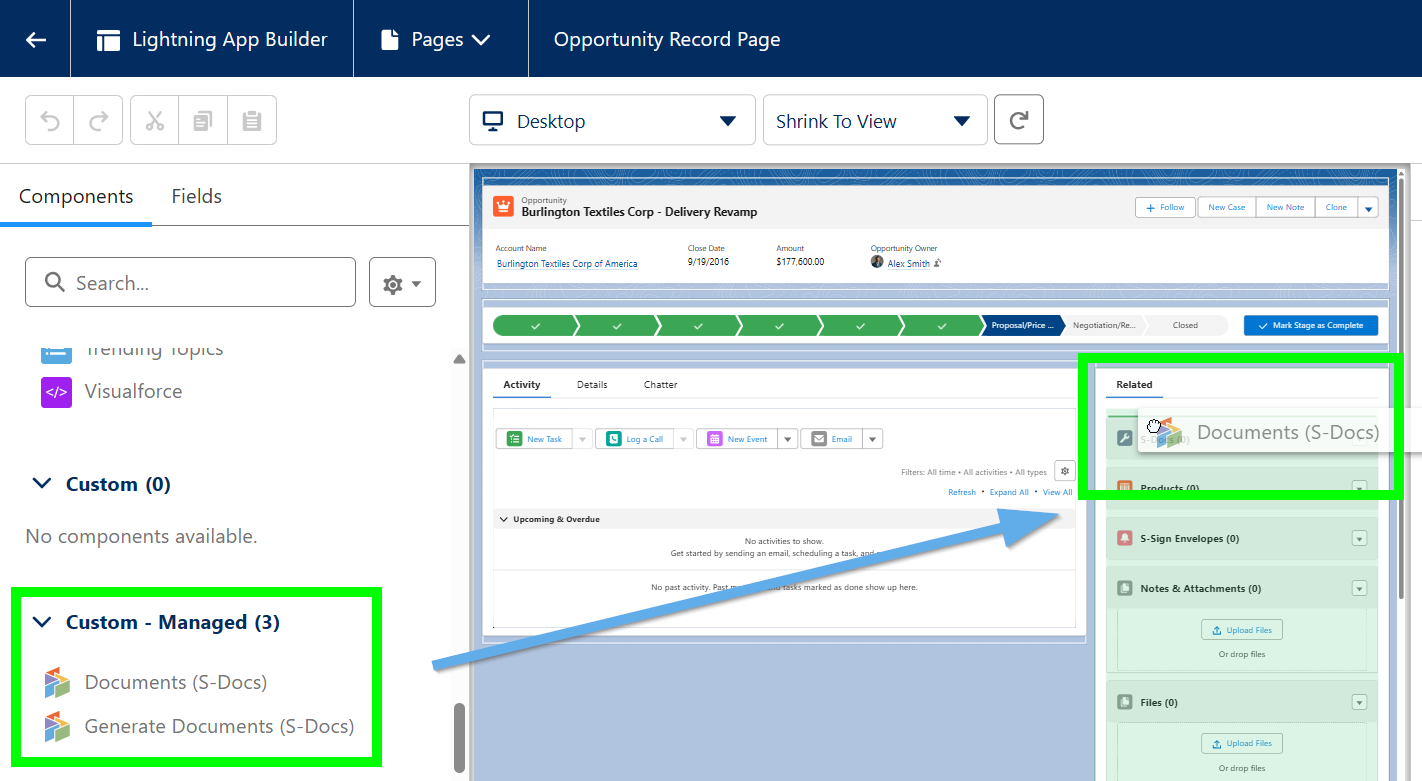
Navigate to a record from the object of your choice (in this example, the Opportunity object is used). Click the Setup Gear, then click Edit Page.

Scroll down the left sidebar to the Custom - Managed section to find the S-Docs LWCs. Drag the Generate Documents (S-Docs) LWC to the sidebar of the page layout. This LWC will display available templates and allow users to select/generate them. Drag the Documents (S-Docs) LWC and place it directly below the Generate Documents (S-Docs) LWC. This LWC will display documents that users have generated and allow them to interact with them.
Next, [1] Click on the Generate Documents (S-Docs) LWC after dragging it onto your page layout (see screenshot below). This will open a menu with options to [2] rename the LWC and provide template names/IDs that correspond to the templates you build and wish to make available to end users for generation. You can also [3] configure aspects of LWC behavior and [4] set conditional visibility (for example, only show a Proposal template when an Opportunity has reached a certain stage). Read more about setting up this LWC in this article.

You can also [1] click on the Documents (S-Docs) LWC to configure the behavior of this LWC, which lists any documents generated for this record. This allows you to [2] rename the LWC, [3] select an email template to automatically pair with any generated documents when they're sent via email, [4] allow users to take various actions including refreshing and editing documents, and [5] set conditional visibility for this LWC (see screenshot below). Click here to learn more about configuring the Documents (S-Docs) LWC.

When you are finished configuring the LWCs, click Save.

One you've built your templates, you can come back and add their names/IDs to the Generate Documents (S-Docs) LWC.
Option 2: Create an S-Docs button for your page layout
While using the built-in Lightning Web Components to generate and manage documents is recommended, you can alternatively create a custom button that will initiate the template selection and document generation processes. This method is required if you will be generating files other than PDF (such as DOCX, XLSX, PPTX, etc.).
In this example, we will be creating the S-Docs button for the Opportunity object. From the setup menu, navigate to the Object Manager, and click the object you're creating the button for.

Click Buttons, Links, and Actions in the sidebar, then click New Button or Link.

Enter the following information for your button:
Button Label & Name: Choose a name. We'll name our button "S-Docs."
Description: Optionally enter a description, such as "Create documents for this object."
Display Type: Detail Page Button
Behavior: Display in existing window without sidebar or header
Content Source: URL
Button URL:
{!URLFOR('/apex/SDOC__SDCreate1', null,[id=Opportunity.Id, Object='Opportunity'])}

Add Your S-Docs Button to Your Object Page Layout
Once you save this button, you'll need to add it to the detail page layout for your object. Click Page Layouts in the sidebar of the object manager for your object. Click the arrow at the left of your page layout, then click Edit.

Click Mobile & Lightning Actions in the sidebar menu. The S-Docs button that you just created will appear in the menu of available mobile & lightning actions. Click and drag it into the "Salesforce Mobile and Lightning Experience Actions" section. Click Save when done.

Add The S-Docs Related List To Your Object Page Layout
Additionally, you should add an S-Docs Related List to your page by clicking Related Lists and dragging the S-Docs box down into the Related Lists table.

The S-Docs Related List on a given record should display all of the S-Docs ever generated for that record, as well as options to download and email those documents again. In order to display this, we need to add these columns to our Related List. Click the wrench icon on the S-Docs related list.

We recommend adding the following columns: View, Edit, Email, Doc Number, Name, Status, Doc Created On. These will display as columns from left to right on your related list (where top=left and bottom=right). To add a column, click on the column you want to add and then click the triangle button below "Add."
Additionally, we recommend sorting by Doc Created On descending.

Click OK once you’ve added all of your fields. The related list will appear as follows on a particular record’s page.

Step 3: Configure Your First Template
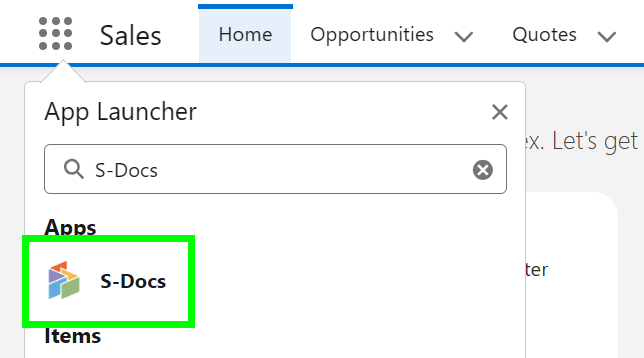
In order to start using S-Docs, you need to configure and activate at least one template. Start by navigating to the S-Docs templates page by clicking on the App Launcher in the upper left corner, typing "S-Docs" into the search bar, and clicking the S-Docs app.
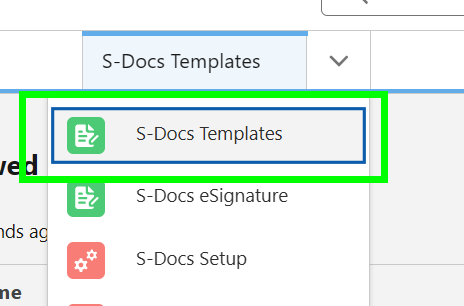
Select the tab dropdown and click S-Docs Templates.
This page is where all of your templates will appear. To create a new template, click New.

This is the template creation page. In this example, we will create an invoice template for the Opportunity object. Each field is explained below the screenshot.

Template Name: Enter a template name. This field is required.
Description: Optionally add a description. You should include any keywords that will be useful when searching for this template, because this field and the name field are searched during the template selection step. End users will see this when they are selecting templates.
Document Category: Optionally chose a category from the picklist. Templates can be grouped together so that a user can browse templates using a category picklist. If needed, you can later customize this picklist.
Related to Type: Pick an object from the picklist. This is the base or primary object this template will use. If needed, you can customize this list with your custom objects. This field is required.
Template Format: Pick an output format. To support the same document in multiple formats, simply clone the template with a different "Format" field value. This field is required.
Document Version: Optionally use this field to track any internally used version number (or date) for this template. This is only for reference purposes.
Available for Use: Keep this box checked (it is checked by default). This ensures that the template is visible for document creation.
Initially Visible: Keeping this box checked (it is checked by default) will make this template visible on initial load of the document creation page based on the object type. Typically, you want to set this checkbox for the 10 most used templates for each object type.
Once you've filled in all of the values to your specifications, click Save. The template is now ready to be edited.
Utilize the Template Editor
Click the arrow on the left of the template detail page to show more buttons, then click the Template Editor button to design your template.

This is a very basic overview of the template editor. For a more in-depth explanation, click here.
This is the WYSIWYG template editor (What You See Is What You Get). Add some text, place the cursor where you want your Salesforce record data to be merged into the template, and then click on the Insert field button.

Select the field from the object you want to insert and click Insert. The editor will add the merge field in the correct syntax into the template editor.

Repeat the above step for other fields. In addition, you can add related lists and insert conditional logic. You can also use the editor tools to modify the document formatting. Or, click Source to view the HTML and add your own styles; the customization options are endless! Click Save when done.

You have now created your first template!
Step 4: Generate And Email Your First Document
The process for generating and emailing documents differs slightly depending on if you are using S-Docs Lightning Web Components (step 2, option 1) or the S-Docs custom button (step 2, option 2).
Generating documents with Lightning Web Components
After you create your first template, navigate back to a record page for the object that you created your template for. Click the Setup Gear in the top right, then click Edit Page.
Click on the Generate Documents (S-Docs) LWC (remember that you may have re-named it), then either add a list of template names/IDs, or search for your template in the Template Name field. Once your template is selected, click Save.

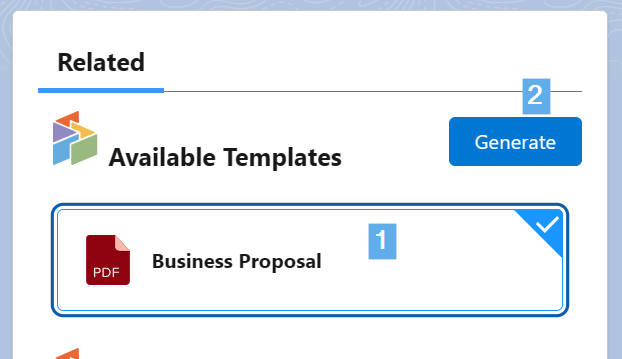
When you navigate back to your record page, the template(s) should be available in the LWC. Simply [1] click the template name(s), then [2] click Generate.
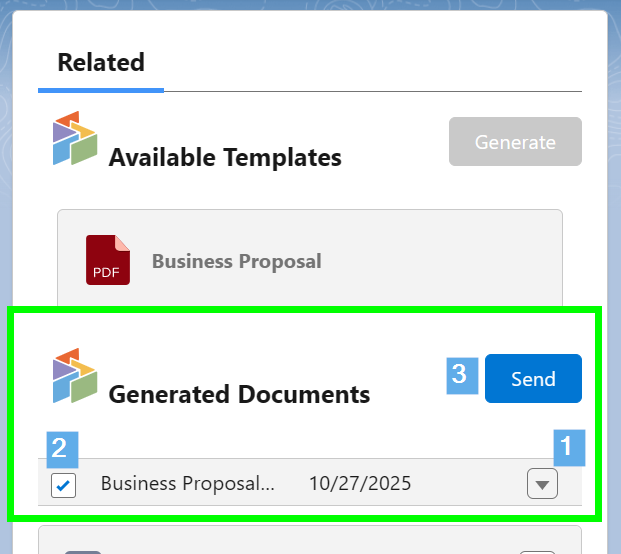
The generated document will appear in the Documents (S-Docs) LWC below. From here, you can [1] click the dropdown arrow next to the document to perform any actions that you've made available, such as refreshing, editing, or viewing version history. You can also [2] click the checkbox to the left of the template name to select it, then [3] click Send to email the template. To learn more about how to create custom email templates that automatically fill these fields in for you, click here.
Generating documents with the custom S-Docs button
Open any record for your object and click the S-Docs button you created.

The template you created earlier will appear. (If it doesn't, make sure you’ve checked the Available for Use and the Initially Visible checkboxes when you created your template. Additionally, make sure you set "Related to Type" to the object you're using.) Select the template and click Next Step.

The document will generate in seconds. You can click on the "View" icon or the document number to view or download your document, or click the pencil icon to edit your document (this option is only available if Allow Edit has been checked on the template record). Click Email Selected Docs to bring up the email page for emailing the document.

You can edit all of the normal email fields on the email page, as well as the body of the email itself. The document you just generated is automatically added as an attachment to the email. To learn more about how to create custom email templates that automatically fill these fields in for you, click here.

Click Send when done. You have now created and emailed your first document with S-Docs!
To learn more about assigning licenses to users and individual permission sets once you install S-Docs in a production org, click here.
Email Failure Troubleshooting
By default, S-Docs links outbound emails to the contact record with a matching email address; Salesforce requires this linkage. If you try to send an email to an email address that is not listed under any Contact record in your org, S-Docs will attempt to link it to a single dummy contact record called "No Contact Record." This contact record is created automatically by the S-Docs package to handle this linkage, and is immediately deleted once the email is sent.
If your org has implemented validation rules that require additional contact fields to be completed, then the S-Docs package will not be able to create this contact record. In this case, there are two main options.
Option 1 (Recommended)
Create a before insert, before update Apex trigger on the Contact object that automatically changes the fields on the No Contact Record that S-Docs creates so that your validation rules are not triggered. For example, the trigger might look like this if your validation rules prevent the contact field "This_Cannot_Be_Null__c" from being null:
trigger ContactFirstName on Contact (before insert, before update) {
    for (Contact c : trigger.new) {
        if (c.LastName == 'No Contact Record') {
            c.This_Cannot_Be_Null__c = 'some non-null value';
        }
    }
}
With this option, S-Docs will be able to create and delete the No Contact Record, and the email will be sent and logged in Activity History on the base object record.If you require test coverage for your No Contact trigger, you can use the following test class:
Class Name: NoContactTestClass
@isTest
private class NoContactTestClass {    @isTest
    public static void noContactTest() {
      Test.startTest();
        Contact testContact = new Contact();
        testContact.LastName = 'No Contact Record';
        insert testContact;
        Test.stopTest();
    }}
Option 2Create the S-Docs No Contact Record manually with all of the fields filled in that are required by your validation rules. The fields that S-Docs requires should be filled in as follows:
First Name: Not Required. We recommend writing S-Docs to avoid confusion.
Last Name: No Contact Record
Email Address: this.email@is.invalid
You then need to add the following parameter to the end of your S-Docs button: useExistingNoContactRecord='true'
Example:
{!URLFOR('/apex/SDOC__SDCreate1', null,[id=Opportunity.Id, Object='Opportunity', useExistingNoContactRecord='true'])}
Note: This option is not recommended, as the email will not be logged in Activity History on the base object record.
Sandbox Deliverability
If you are testing S-Docs in a sandbox org and emails are not being delivered, you should check Setup > Email Administration > Deliverability, and check that "Access to Send Email" is set to "All email." By default, Salesforce turns off outbound email access when a sandbox is created to reduce the risk of inadvertently sending emails to contacts during development and testing. Be aware that this change affects the entire sandbox and not just S-Docs.