Introduction
This article explains how to configure Salesforce and an OpenID Connect (OIDC)–compliant identity provider to support alternative authentication (for example, smart cards like CAC/PIV) with S-Docs / S-Sign.
The instructions apply to any standards-compliant OIDC provider (such as Okta, EAMS-A, etc.).
Prerequisites
- Your Salesforce org supports alternative authentication for S-Docs / S-Sign.
- An OpenID Connect identity provider is available and accessible.
- An OIDC client application has been created in your identity provider.
If you have not already set up and configured S-Sign, refer to the S-Sign Quick Install & Configuration Guide for required Visualforce and S-Sign setup steps.
Overview of the OpenID Connect Flow
- Salesforce redirects the user to the OIDC authorization endpoint.
- The identity provider authenticates the user.
- The identity provider redirects the user back to Salesforce with tokens.
- S-Sign reads specific claims from the returned token based on configuration stored in Salesforce Custom Metadata.
Correct token claims and metadata mapping are required for S-Docs / S-Sign to recognize the authenticated signer.
Configure An OpenID Connect Client Application
In your identity provider’s administrative console:
- Create a new OIDC application
- Choose OpenID Connect as the protocol.
- Select an application type appropriate for server-side authentication (commonly Web Application).
- Configure Redirect URIs
- Add the Salesforce redirect URL used by S-Sign (the SSign.AuthenticationRedirect endpoint).
- Add the Salesforce redirect URL used by S-Sign (the SSign.AuthenticationRedirect endpoint).
- Save the client credentials
- You will need the Client ID when configuring Salesforce.
Required Token Claims for S-Docs / S-Sign
Your identity provider must include the following claims in the returned token. These claims may be included in an ID token or access token, depending on your provider’s configuration.
Mandatory Claims*
| Claim Name | Purpose | Notes |
sub
|
Subject identifier | Must uniquely identify the authenticated user |
serial_number
|
CAC/PIV or identity number | Used for signer identity verification |
full_name
|
Human-readable signer name | Used for display and audit purposes |
*Claim names must exactly match what is referenced in Salesforce configuration.
Create the Alternative Authentication Configuration in Salesforce
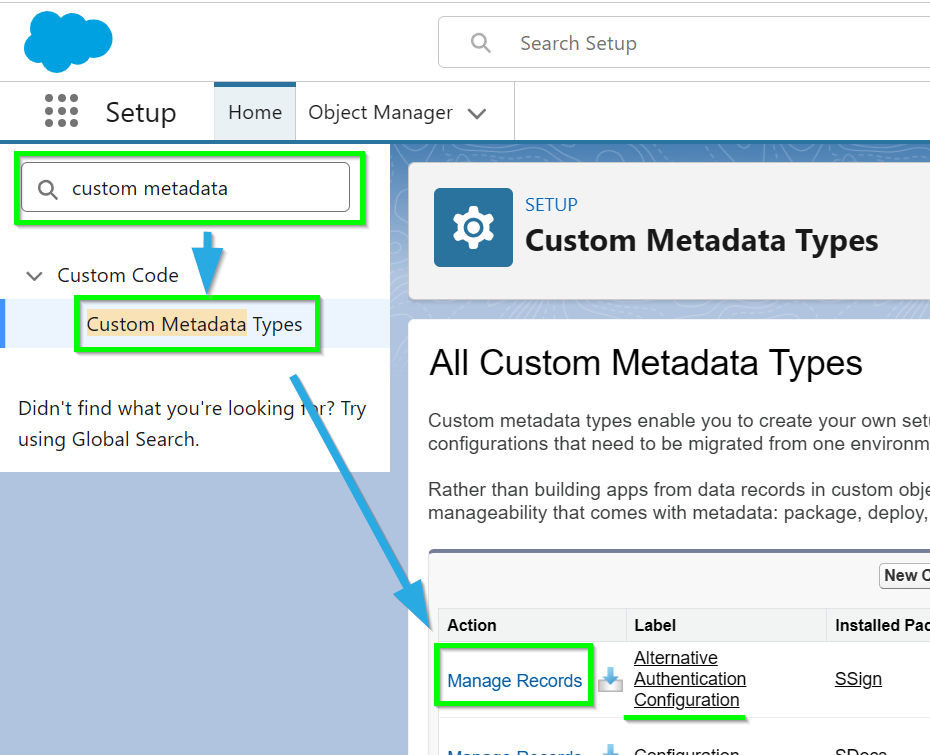
Navigate to Salesforce Setup, type "Custom Metadata" into the Quick Find bar and click Custom Metadata Types. Find Alternative Authentication Configuration and click Manage Records.
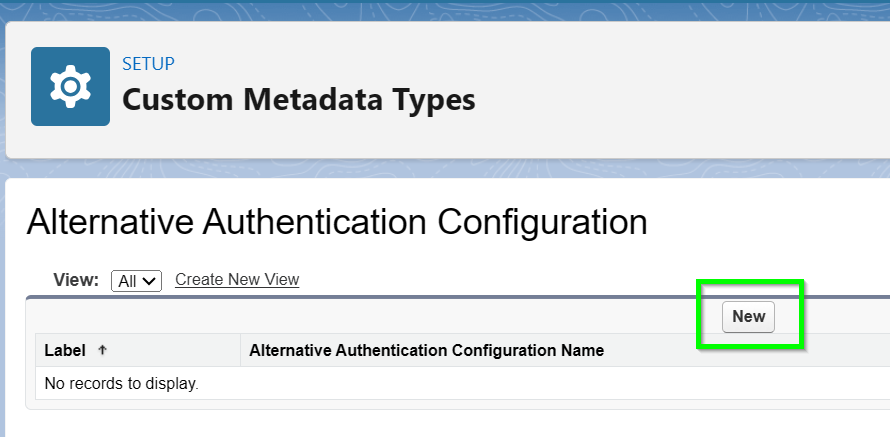
Click New.
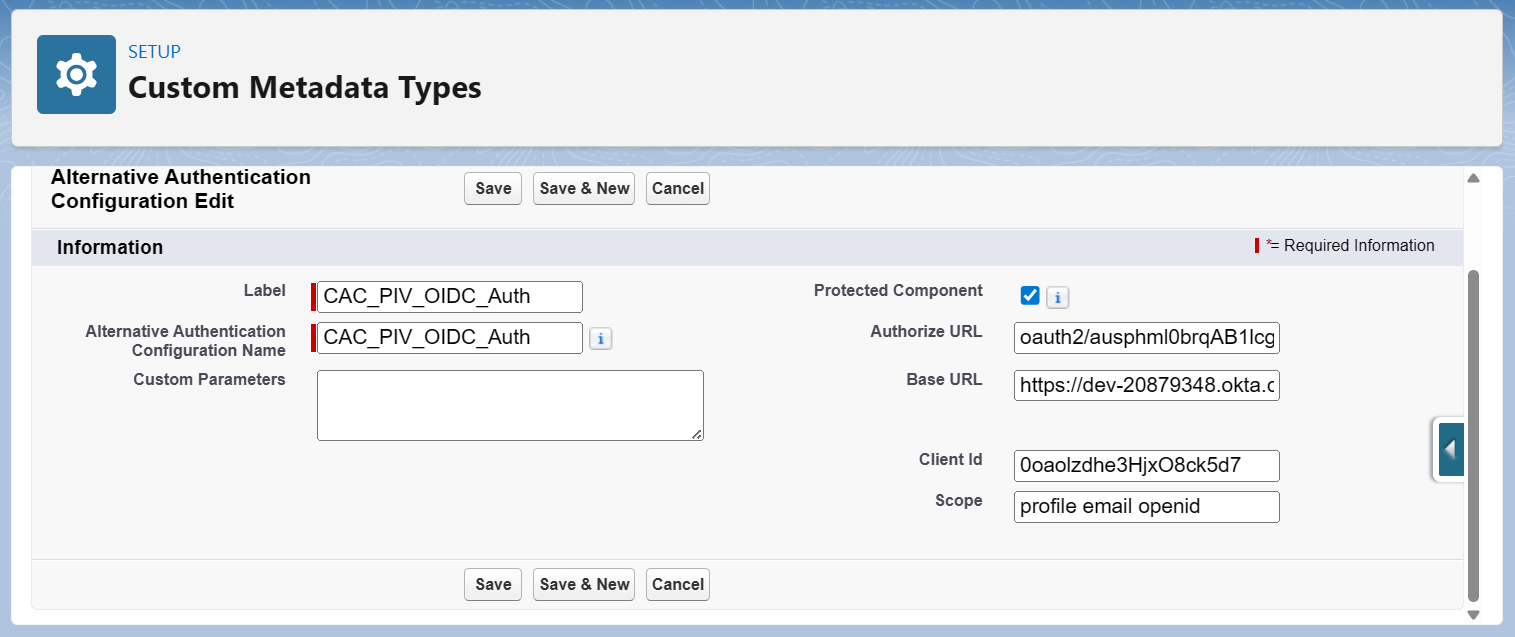
Fill in the following values.
Alternative Authentication Configuration Fields
| Field | Description | Notes |
| Label
Example Value: CAC_PIV_OIDC_Auth |
Friendly name for the configuration | Used for admin readability only |
| API Name
Example Value: CAC_PIV_OIDC_Auth |
Internal identifier | Must be unique in Salesforce |
| Base_URL__c
Example Value: https://login.identityprovider.com |
Base URL of the identity provider | Root domain of the OIDC service |
| Authorize_URL__c
Example Value: /oauth2/v1/authorize |
Authorization endpoint path | Path only, not full URL |
| Client_Id__c
Example Value: 0oa9xmplr3abcXYZ1234 |
OIDC client identifier | Issued when OIDC app is created |
| Scope__c
Example Value: openid profile email |
Scopes requested during authentication | Must include openid |
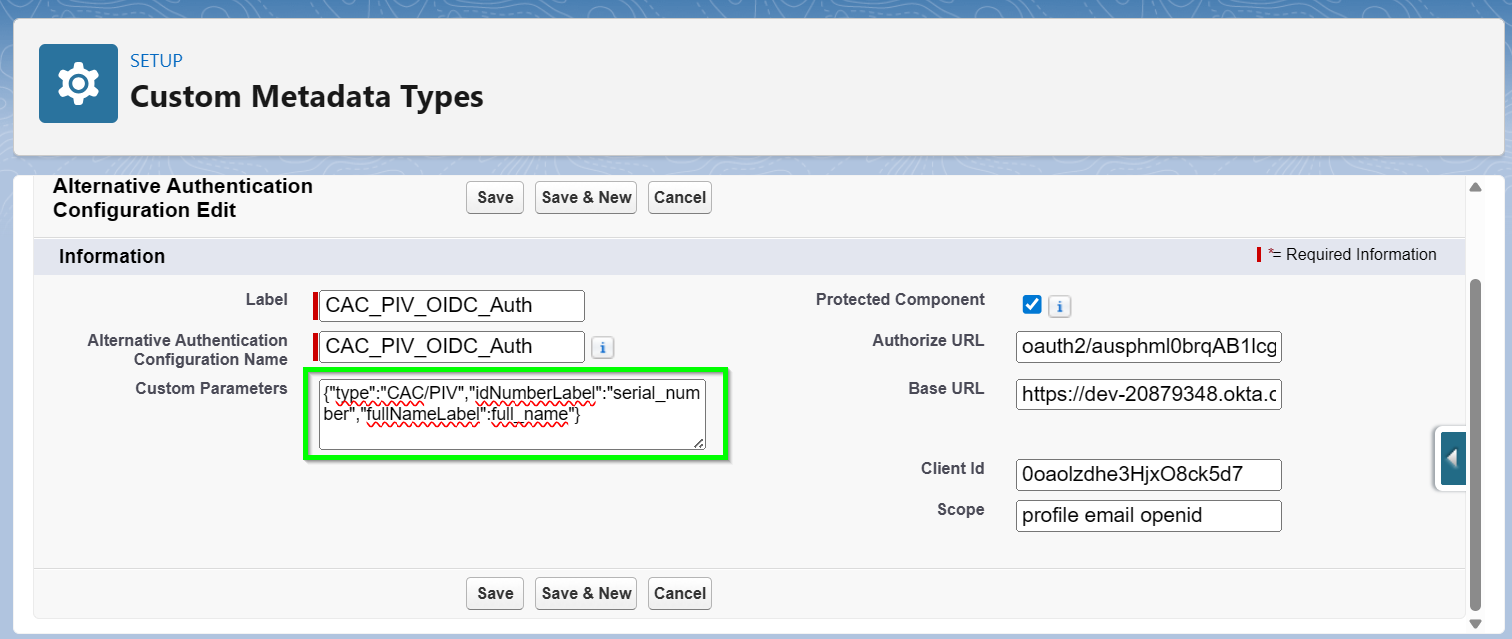
| Custom_Parameters__c
Required: See Example In Next Section Below |
JSON map defining claim mappings | Keys must match exactly for S-Docs / S-Sign |
Custom_Parameters__c (Required for S-Docs / S-Sign)
The Custom_Parameters__c field defines how S-Docs / S-Sign maps token claims to signer identity fields.
Required JSON Keys
The JSON object must include the following keys exactly as shown:
{

  "type": "CAC/PIV",

  "idNumberLabel": "serial_number",

  "fullNameLabel": "full_name"

}
Key Definitions
| Key | Required Value | Purpose |
type
|
CAC/PIV | Identifies the authentication method |
idNumberLabel
|
Claim name (e.g., serial_number) | Tells S-Sign which claim contains the identity number |
fullNameLabel
|
Claim name (e.g., full_name) | Tells S-Sign which claim contains the signer’s name |
Click Save when finished. To verify success:
- Initiate an authentication flow.
- Confirm that:
- Salesforce redirects to the identity provider.
- Authentication succeeds.
- Tokens returned include the required claims.
- S-Docs / S-Sign correctly identifies the signer.
Configure Templates for Alternative Authentication
Alternative Authentication can be configured on a per-template basis.
Navigate to an S-Sign-enabled S-Docs Template record and open the Template Editor.

Open the Signer Profiles tab in the S-Sign panel. Create or modify an existing Signer Profile and use the Verification Type field to assign the CAC/PIV authentication type to any profile.
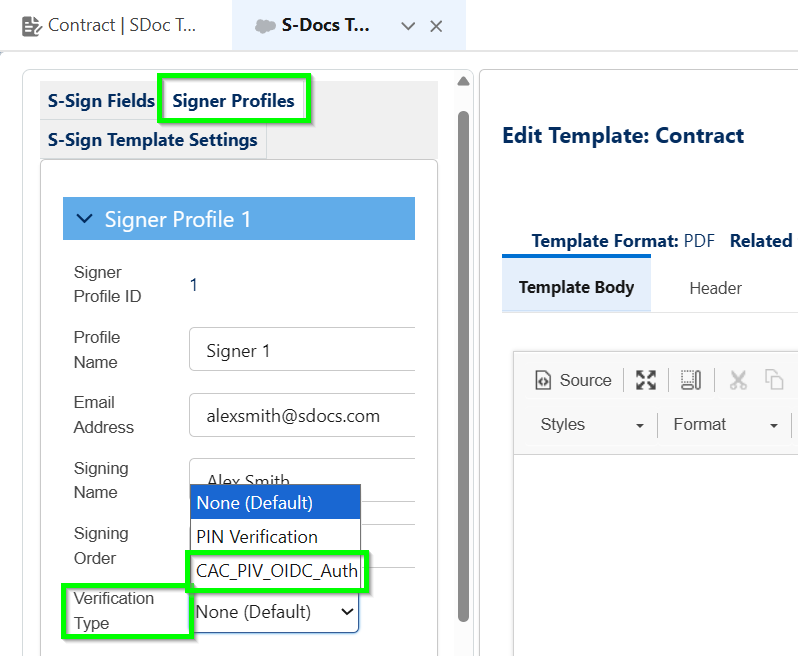
You can remove the verification requirement from individual profiles by choosing None (Default) or PIN Verification on a per-profile basis.
Summary of Client-Side Requirements
For S-Docs / S-Sign compatibility, the identity provider must:
- Support OpenID Connect
- Return a valid token containing:
- sub
- serial_number
- full_name
- Redirect to Salesforce using the configured redirect URI
- Use claim names that match the Custom_Parameters__c mappings exactly
This configuration allows S-Docs / S-Sign to remain identity-provider agnostic while enforcing secure, standards-based identity verification.