Introduction
S-Docs connects seamlessly with Google Drive, meaning that you can generate documents securely on the Salesforce platform and then upload them to Google Drive right away -- all without ever leaving Salesforce. This article will provide you with step-by-step instructions for configuring the S-Docs and Google Drive integration.
The S-Docs package already includes all needed components that allow it to work with Google Drive. However, your admin will need to complete the following steps to enable the feature.
Step 1: Create a Named Credentials for Google Drive
Create a Google Client
- Navigate to the Google Cloud Platform.
- Click on the project dropdown on and click NEW PROJECT


- After the project is completed, on the left side menu select APIs & Services -> Credentials

- Click the + CREATE CREDENTIALS on the top menu and select OAuth client ID

- Choose Web Application for application type - the name does not matter.
- Leave everything blank for now and just click create:

- After clicking create, a popup will appear that has the Client ID and Client Secret, keep those two saved since we’ll need it later.

- Click “OK” and click on your new credential.
- Locate Authorized redirect URLs, click on + ADD URI, and insert:
https://[my.salesforce.com Domain URL]/services/authcallback/GoogleAuth
Example: https://example.my.salesforce.com/services/authcallback/GoogleAuth
- Click Save
Step 2: Create Auth. Provider in Salesforce
- Navigate to the Auth. Providers page through Setup
- Click “New” to create a new auth provider and select Provider Type: Open ID Connect.
- Fill in the credentials
Name: GoogleAuth
URL suffix: Anything that matches with the name
Consumer Key: saved Client ID
Consumer Secret: saved Client Secret
Authorize Endpoint URL: https://accounts.google.com/o/oauth2/auth?access_type=offline&approval_prompt=force
Token Endpoint URL: https://oauth2.googleapis.com/token
User Info Endpoint URL: leave blank
Token Issuer: leave blank
Default Scopes: openid https://www.googleapis.com/auth/drive
Send access token in header: Checked
Send client credentials in header: Unchecked
Include Consumer Secret in SOAP API Responses: Checked
- After clicking save, a Salesforce Configuration will appear under Auth. Provider Detail. Save the Callback URL and ensure it matches the URL specified in Step 9 of the Google Client Setup. If it does not, update the URL on the Google Client Side to match the Callback URL.
Step 3: Add Named Credentials to Salesforce
Create External Credential
- In Salesforce, navigate to Setup > Security > Named Credentials > External Credentials tab > Click NEW
- Fill in the following information:
Label: GoogleDriveUpload
Name: GoogleDriveUpload
Authentication Protocol: OAuth 2.0
Authentication Flow Type: Browser Flow
Scope: openid https://www.googleapis.com/auth/drive
Identity Provider > Auth Provider: GoogleAuth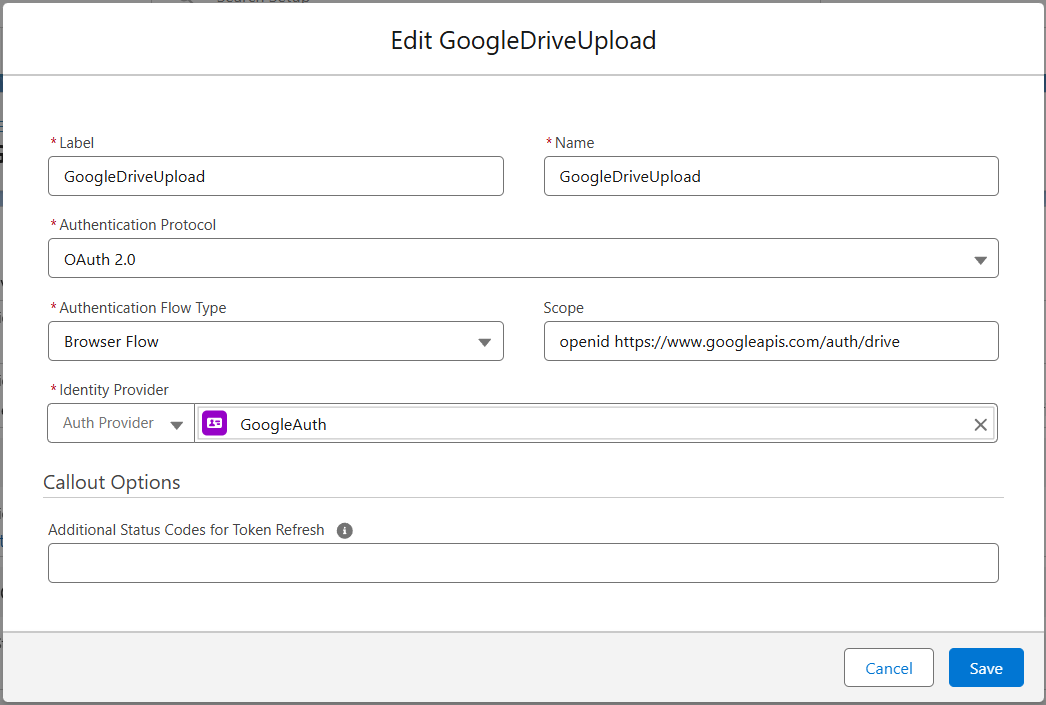
Create Named Principal
- In Salesforce, navigate to Setup > Security > Named Credentials > External Credentials tab > click GoogleDriveUpload > Under Principals click New (Typically you are in the External Credential page after creation)
- Fill in the following information:
Parameter Name: GoogleDriveUpload
Sequence Number: 1
Identity Type: Named Principal
Scope: null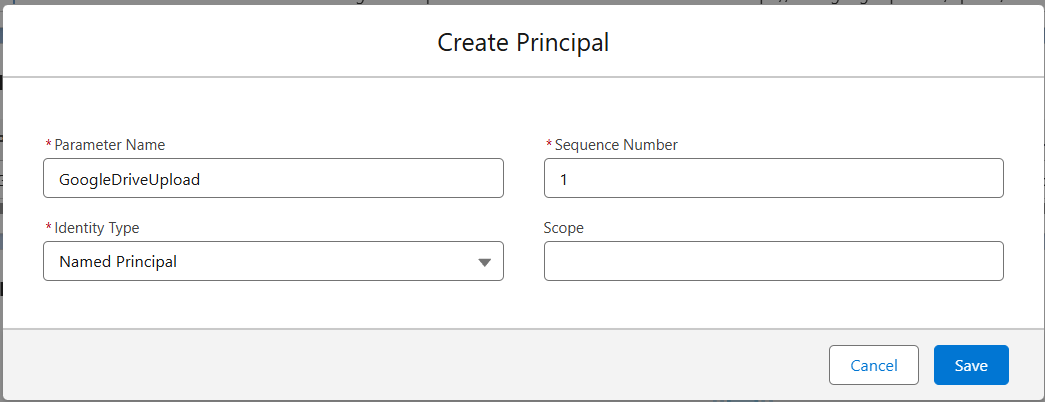
- After adding the Named Principal, you will need to authenticate.
- This is done by clicking the arrow under Actions and clicking Authenticate. Continue to follow the browser flow to log in and approve. Once you approve, you will be redirected back to Salesforce page.

Create Named Credential
- Navigate to Named Credentials from Settings and click New Named Credential
- Fill in the following information:
Label: GoogleDriveUpload
Name: GoogleDriveUpload
URL: https://www.googleapis.com/upload/drive
External Credential: Choose GoogleDriveUpload in dropdown
Generate Authorization Header: Checked
Allowed Namespaces for Callouts: SDOC

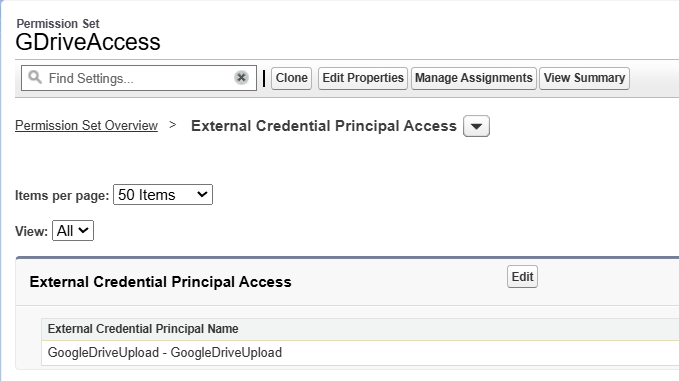
Step 4: Create and Assign Permission Set to User
- The permission set should contain the following:
- Read access for the object: User External Credentials
- External Credential Principal Access - “GoogleDriveUpload - GoogleDriveUpload”
Step 5: Add Google Docs Enabled Checkbox to Template Detail Page & Activate Templates for Google Drive
Administrators are able to determine which documents are eligible for upload to Google Drive with the Google Docs Enabled checkbox. This checkbox is not visible by default, however, and must be added to the template detail page layout.
- From the Setup menu, navigate to the Object Manager and find the SDoc Template object.
 Navigate to the Page Layouts tab, click the dropdown arrow for the SDoc Template page layout, and click Edit.
 Navigate to the Fields tab, find the Google Docs Enabled field, and drag it down into the SDoc Template Detail section. Click Save.

This checkbox will now appear on all template detail records. You can now check it to determine whether new documents generated with this template can be uploaded to Google.

For more information on generating and uploading S-Docs documents to Google Drive, please review our guide Using Google Drive.
Step 6 (Optional): Specify A Google Drive Folder
By default, all S-Docs uploaded to Google Drive will be stored in the user's base Google Drive folder. You can specify a different folder to upload your document to at the template level.
If your template is Google Docs enabled, the Document Options tab in the template editor will contain additional Google Drive options where this can be configured.

[1] To specify which folder documents generated using this template should be stored within, paste the folder ID into this field.
[2] Check this box to upload your document to Google Drive in its native format. By default, all documents uploaded will be converted to Google Docs. This checkbox will cause a PDF to upload as a PDF instead of a Google Doc.