Introduction
S-Docs can be used in Salesforce Sites too! In this guide, we will be setting up this functionality for a particular Salesforce object (you will need to follow the steps in this guide for each object you are enabling S-Docs with Sites for). To do so, all we have to do is create a button that will show up for your Site users and add it to an object’s page layout.
This button is not unique to communities; it will also exist in our production org and operate exactly the same as an ordinary S-Docs button. This means if we already have an S-Docs button, we will be replacing it with a new button that can be used by Site users as well as users in our production org.

Step 1: Create the S-Docs for Sites Button
In this step, we will be creating a button that will enable the use of S-Docs with Salesforce Sites for a particular object. In this example, we will be creating the button for an opportunity.
- You will first need to navigate to the “Buttons, Links, and Actions” page for the Salesforce object you would like to create a Sites button for.
a.) Custom Objects
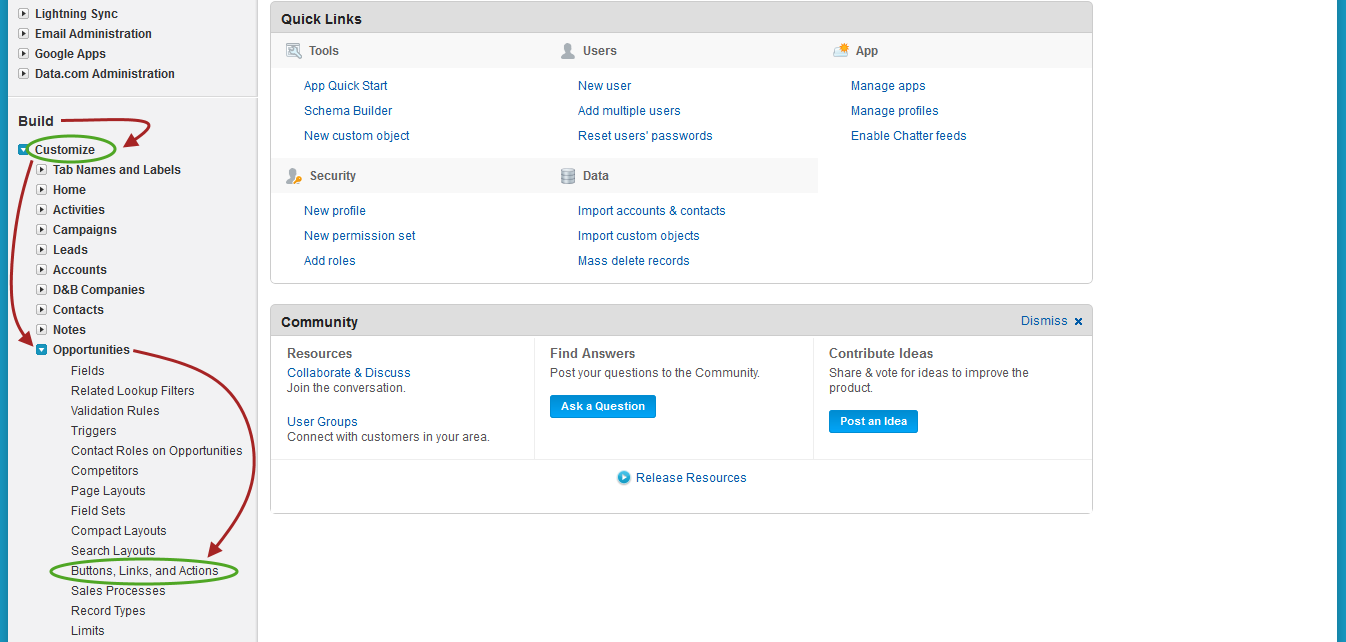
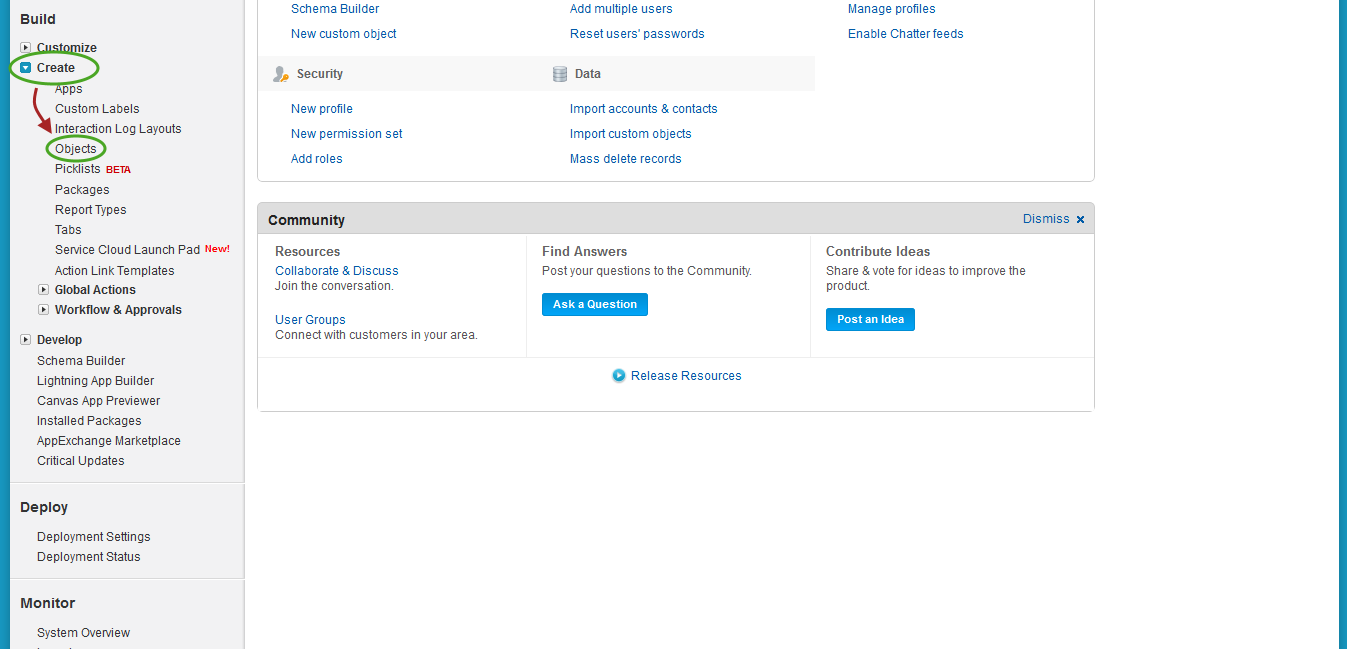
Navigate to Setup > Build > Create > Objects.

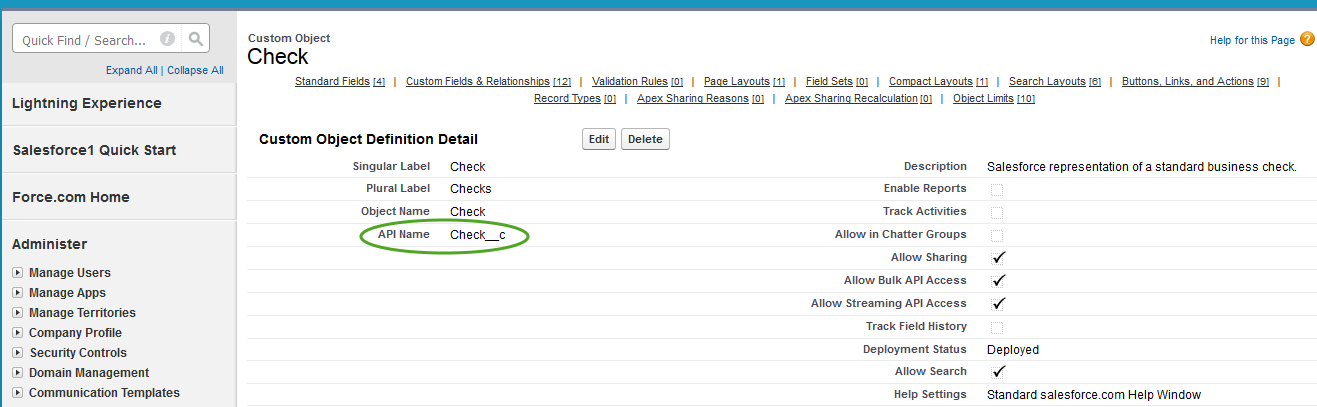
Find the name of the custom object you would like to create the button for and click the name of this object (do not click the Edit button). In this example, we will be creating the button for the Check object, a custom object representing the data for a standard business check.

Next, a page will display for your custom object.
The API Name is often just the “Object Name” appended with __c (note the two underscores), but sometimes this is not the case, so please take note of that here. In the case of our custom Check object, we will note that our API Name is Check__c.
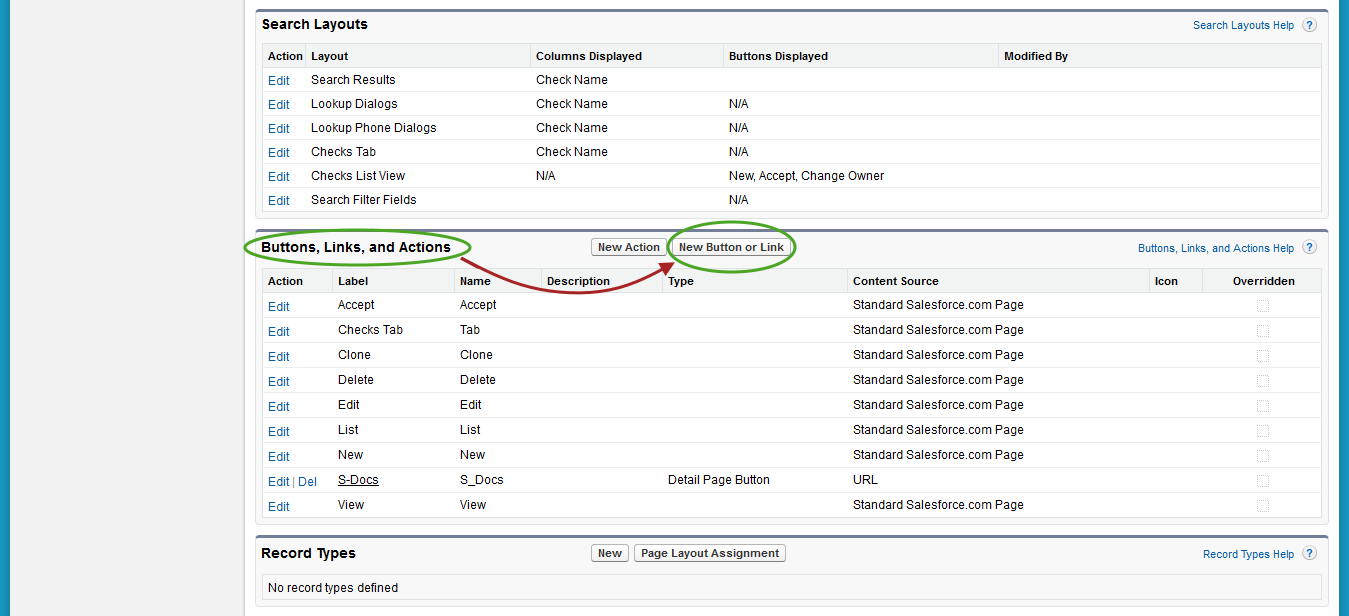
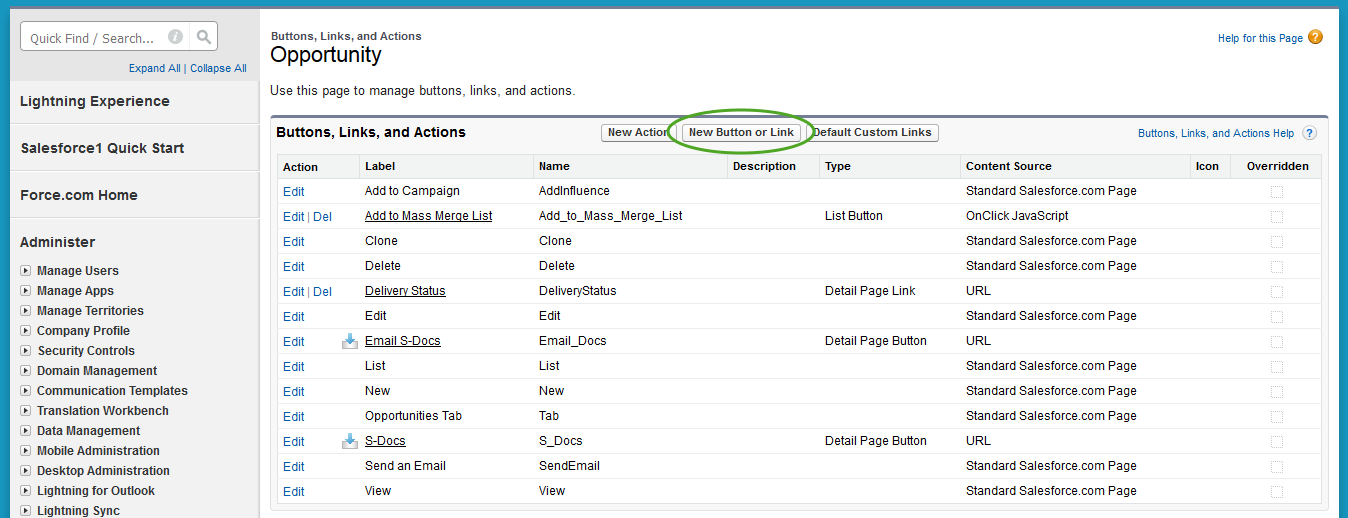
On the page for your custom object, scroll down to “Buttons, Links, and Actions” and click New Button or Link.
This concludes part (a).
b.) Standard Objects
Navigate to Setup > Build > Customize > YourObjectNameHere > Buttons, Links and Actions. In this example, we will be finding the “Buttons, Links, and Actions” page for an Opportunity.
Once you’re on the “Buttons, Links, and Actions” page for your standard object, click New Button or Link.
This concludes part (b).
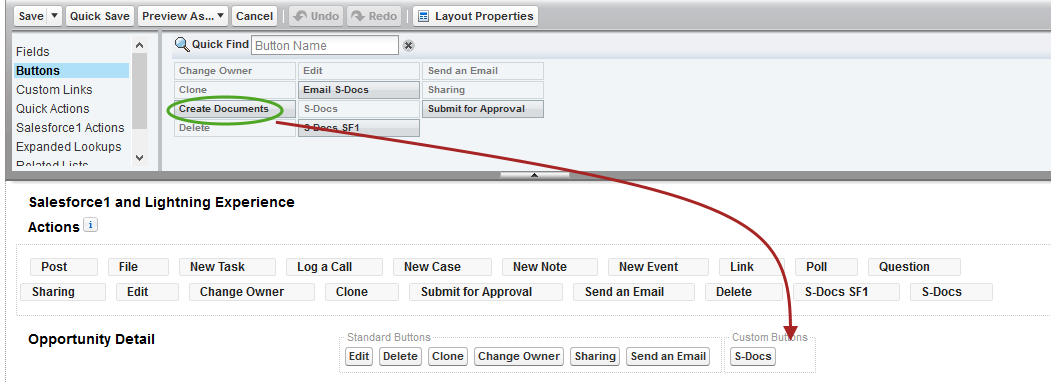
- We will now complete the “New Button or Link” page. Here is how the finished page might appear:
Here’s what to fill in:
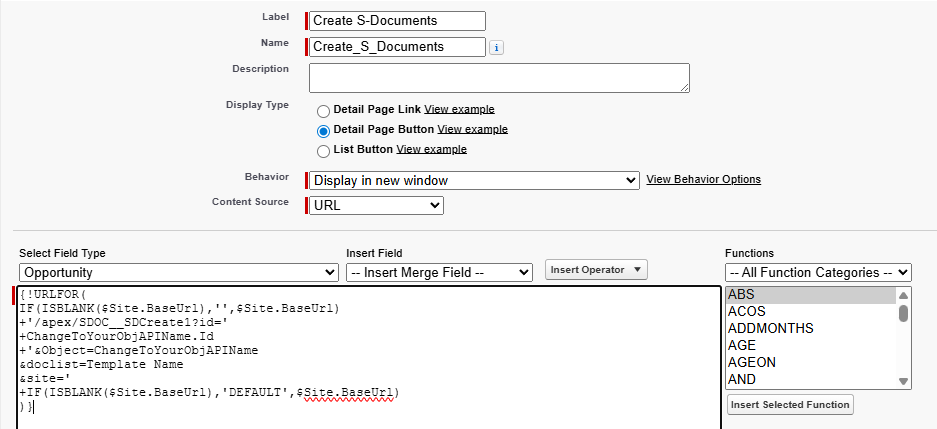
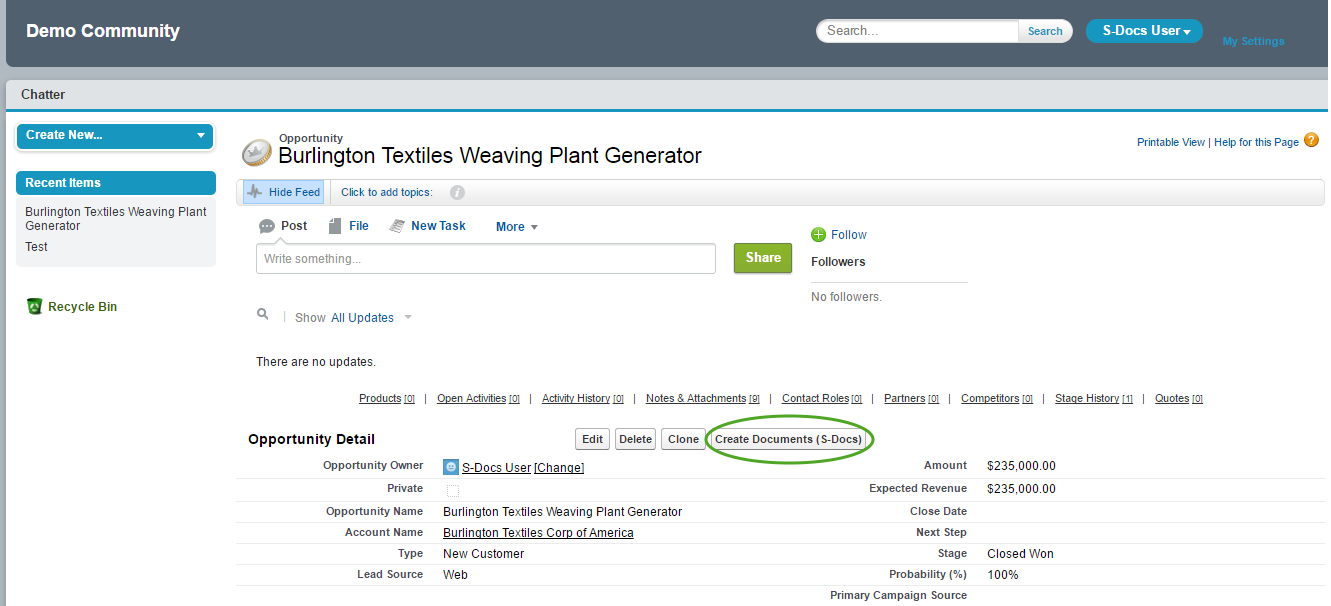
Label: Create Documents (S-Docs)
Name: Create_Documents_S_Docs
Display Type: Detail Page Button
Behavior: Display in existing window without sidebar or header
Content Source: URL
Finally, paste the following code into the “Custom button or link editor.”
{!URLFOR(<br aria-hidden="true">IF(ISBLANK($Site.BaseUrl),'',$Site.BaseUrl)<br aria-hidden="true">+'/apex/SDOC__SDCreate1?id='<br aria-hidden="true">+ChangeToYourObjAPIName.Id<br aria-hidden="true">+'&Object=ChangeToYourObjAPIName<br aria-hidden="true">&doclist=Template Name<br aria-hidden="true">&site='<br aria-hidden="true">+IF(ISBLANK($Site.BaseUrl),'DEFAULT',$Site.BaseUrl)<br aria-hidden="true">)}
Again, please make sure that all appearances of “ChangeToYourObjAPIName” have been changed to your object’s API name. Click Save to finish the button.
Step 2: Add the S-Docs for Sites Button to the Page Layout
Now, all we have to do is add the button we just created to our object’s page layout.
- You will first need to navigate to the “Page Layout” page for the Salesforce object you would like to add the button to.
a.) Custom Object Page Layout
Navigate to Setup > Build > Create > Objects.
Find the name of your custom object and click the name of this object (do not click the Edit button). In this example, we will be adding the button to a Check’s page layout.

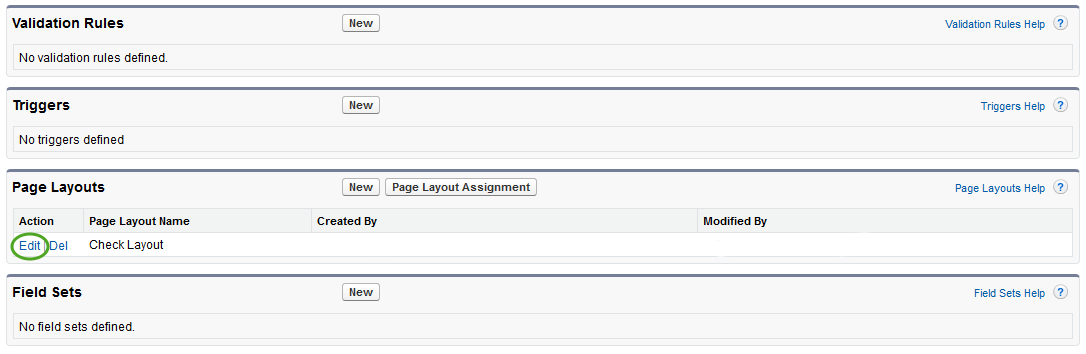
On the page for your custom object, scroll down to “Page Layouts” and click Edit next to “YourObjectName Layout.”
This concludes part (a).
b.) Standard Object Page Layout
Navigate to Setup > Build > Customize > YourObjectNameHere > Page Layouts. In this example, we will be finding the “Page Layouts” page for an Opportunity.
Now click Edit next to “YourObjectName Layout.” (There may be other layouts, such as “YourObjectName Layout SDoc”. Do not edit these; only edit “YourObjectName Layout.”)
This concludes part (b).
- Now we can add the button to the page layout. Drag the button you created in Step 1 into the “Custom Buttons” box. If there is already an S-Docs page button here, you may remove it from the “Custom Buttons” box by dragging it into the toolbar you pulled your Create Documents (S-Docs) button from. Your new button works the same as the old S-Docs button, except now it can be used by Sites.
Here’s how the finished page will appear.
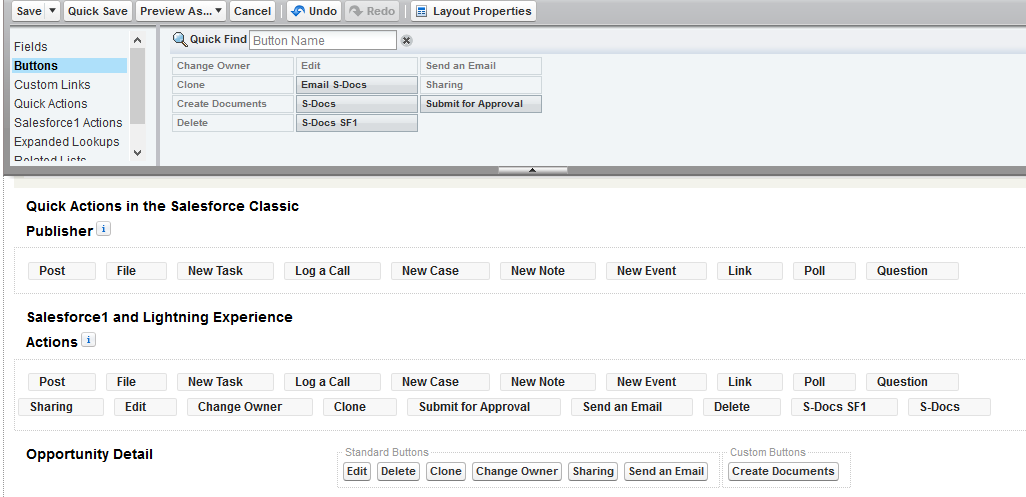
Click Save and you’re all done! You should now have an S-Docs button on your object’s page that can be used by users in your communities, as well as users in your production org.
Using Automation with Sites Users
If you require your Site users to insert S-Docs Jobs (for example, by invoking document automation through a Flow or Apex trigger), take the following into account.
ContentVersions inserted by Community users must not have a null NetworkId (Community ID) field. While this field is normally auto-populated, in some instances population fails.
To correct this, you can configure your Flow, Apex trigger, or Process to set the S-Docs Jobs NetworkId field to the following:
Network.getNetworkId();
This will ensure that the ContentVersion NetworkId field is always populated, and S-Docs Jobs inserted by Site users will not fail.